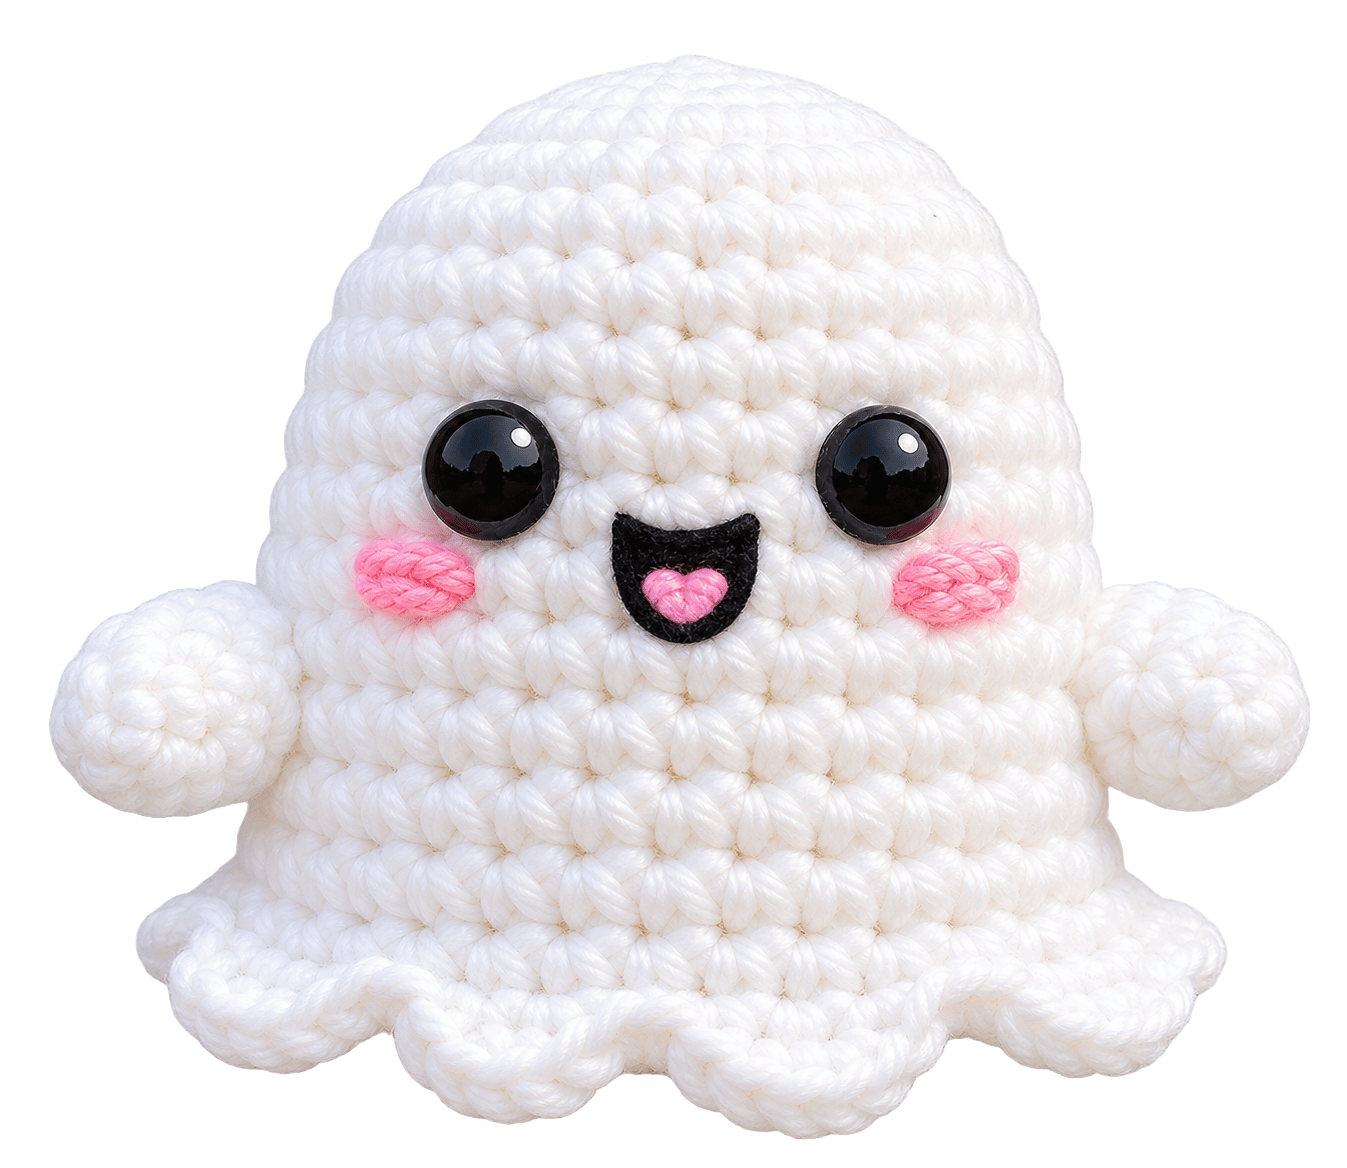
A tiny ghost with a soft body, little arms, and a face that looks more cute than spooky?
This Mini Crochet Cute Ghost Plushie Pattern makes a small amigurumi ghost that works beautifully as a desk buddy, Halloween decoration, bag charm, shelf decoration, or handmade gift. You only need basic crochet skills, a few simple stitches, and some stuffing to create the rounded ghost shape.
The pattern uses simple increases and decreases to shape the body. You can also change the face, yarn colors, or accessories to give your ghost a completely different personality. Want a sleepy ghost? Add closed eyes. A mischievous ghost? Give it a tiny smile. A Halloween version? Add a miniature pumpkin or witch hat.
Materials
Yarn: White worsted/DK yarn
Hook: 2.5–3.0 mm
Stuffing: Polyester fiberfill
Eyes: 6 mm safety eyes or black embroidery thread
Other: Tapestry needle, stitch marker, scissors
Measurements / Sizing
Using medium-weight yarn and a 3.0–3.5 mm hook, the finished ghost should measure approximately:
- Height: 9–11 cm
- Width: 7–8 cm
- Arm length: 2–3 cm
For a larger ghost, use thicker yarn with a larger hook. For a miniature version, use thinner yarn and a smaller hook.
Gauge and Stitch Pattern
You don’t need a traditional gauge swatch for this small project, but your stitches should create a firm, dense fabric.
For amigurumi, the exact gauge matters less than stitch tension. Your main goal involves preventing visible holes between stitches.
Stitch Pattern
The entire body mainly uses:
Single crochet (sc)
You will also use:
- Increase (inc): 2 single crochet stitches in the same stitch
- Decrease (dec): single crochet two stitches together
Keep your tension steady. If your stitches become noticeably looser as you crochet, adjust your grip before continuing.
Stitch Abbreviations
| Abbreviation | Meaning |
| MR | Magic Ring |
| ch | Chain |
| sc | Single Crochet |
| inc | Increase |
| dec | Decrease |
| sl st | Slip Stitch |
| FO | Fasten Off |
| st/sts | Stitch/Stitches |
| Rnd | Round |
Skill Level – Beginner
You should know how to:
- Make a magic ring
- Crochet single crochet
- Increase
- Decrease
- Work in continuous rounds
- Fasten off
- Weave in yarn ends
If you already know basic amigurumi construction, you can probably work through the pattern without much trouble.
If you’re completely new to amigurumi, don’t worry. The body uses the same basic idea throughout: increase to make the shape wider, crochet even rounds to maintain the shape, then decrease to close it.
Notes Before You Start
This ghost uses single crochet stitches worked in continuous rounds. You won’t join each round unless the instructions specifically tell you to do so.
Place a stitch marker into the first stitch of every round. Move the marker upward as you complete each round.
Mini Crochet Ghost Plushie Pattern
Ghost Body
Start with white yarn.
Round 1
Make a magic ring.
Crochet 6 sc into the ring.
Total: 6 stitches
Pull the magic ring closed. Keep the center tight so stuffing cannot work its way through later.
Round 2
Increase in every stitch around.
6 inc (12)
Your circle should start expanding.
Round 3
Repeat:
(sc, inc) × 6 (18)
You should now have a wider circular base.
Round 4
Repeat:
(2 sc, inc) × 6 (24)
The body will begin taking shape as you build upward.
Round 5
Repeat:
(3 sc, inc) × 6 (30)
Check your stitch count before moving on. A missed increase here can shift the entire shape.
Rounds 6–10
Crochet:
30 sc around (30)
Repeat this for five rounds.
These even rounds create the main height of the ghost.
As you work, gently shape the piece with your fingers. The body should start looking rounded rather than completely flat.
Add the Ghost’s Face
Place the eyes between Rounds 7 and 8, leaving approximately 5–6 stitches between them.
The exact placement depends on the expression you want.
For a classic cute ghost:
- Place two black eyes slightly above the center.
- Add a tiny embroidered mouth underneath.
- Optionally add two tiny pink cheeks.
Three easy face ideas
Classic:
Two round eyes + small open mouth.
Sleepy:
Embroider two curved lines for closed eyes.
Happy:
Use small oval eyes with a curved smiling mouth.
Ever wondered why such tiny changes make amigurumi faces look completely different? Face placement creates most of the personality. Move the eyes slightly closer together for a younger, cuter expression. Place them farther apart for a more cartoon-like look.
Begin Shaping the Ghost
After completing Round 10, start reducing the body.
Round 11
Repeat:
(3 sc, dec) × 6 (24)
The body should begin narrowing toward the top.
Round 12
Repeat:
(2 sc, dec) × 6 (18)
Add a small amount of stuffing now.
Don’t fill the body completely yet. You need room to continue crocheting and shaping the top.
Round 13
Repeat:
(sc, dec) × 6 (12)
Add more stuffing.
Use your fingers to distribute the stuffing evenly. Push some toward the bottom and sides so the ghost keeps a rounded silhouette.
Round 14
Repeat:
6 dec (6)
You should now have six stitches remaining.
Add a little more stuffing if the body still feels soft or hollow. Avoid overfilling it.
Cut the yarn, leaving a long tail.
Thread the yarn through the front loops of the remaining six stitches. Pull gently to close the opening.
Secure the yarn and hide the tail inside the body.
Create the Ghost’s Wavy Bottom
The rounded body already looks cute, but the bottom needs a little character. You can create a simple wavy edge by crocheting a decorative lower section before building the body, or you can add a scalloped border afterward.
For an easy decorative edge, attach white yarn around the lower edge.
Try:
sl st, 3 sc in next stitch, sl st in next stitch
Repeat around the bottom.
This creates small rounded bumps that imitate a floating ghost’s wavy sheet.
Don’t pull the stitches too tightly. A relaxed edge gives the bottom a softer, flowing appearance.
If you prefer a simpler plushie, skip the decorative edge entirely. A smooth rounded base still looks great.
Crochet the Tiny Ghost Arms
The arms require very little yarn, which makes them perfect for using leftover scraps.
Make two arms.
Arm — Make 2
Start with white yarn.
Rnd 1: 6 sc into MR (6)
Rnd 2–4: 6 sc around (6)
Do not add much stuffing. You can leave the arms lightly stuffed or completely unstuffed depending on how floppy you want them.
Fasten off and leave a long yarn tail for sewing.
Attach the Arms
Position each arm around the upper-middle section of the body.
A good starting point sits around Rounds 8–10.
Sew each arm securely using a yarn needle.
Pass the needle through the arm and into the body several times. Keep the stitches small so they disappear into the white yarn.
Position both arms at similar heights, or deliberately place one slightly higher for a playful pose.
Assembly & Finished Size
Attach the Eyes
If you use safety eyes, insert them between Rounds 7 and 8, leaving approximately 5–6 stitches between them.
If you prefer embroidered eyes, use black embroidery thread and create two small oval or round eyes in the same position.
Check the placement from the front before securing anything. Even a one-stitch difference can noticeably change the expression on a small amigurumi.
Embroider the Mouth
Use black embroidery thread to create a tiny mouth about 1–2 stitches below the eyes.
For a simple cute expression, make a small oval or short curved smile. Keep the mouth small so it doesn’t overpower the face.
Add Optional Cheeks
Use pink embroidery thread to add two tiny cheeks underneath the eyes.
Make just a few small stitches on each side. You don’t need much color to create a soft, rosy look.
Attach the Arms
Position one arm on each side of the ghost around Rounds 8–10.
Use the long yarn tails left from the arms to sew them securely to the body. Pass the needle through the arm and body several times, then weave the remaining yarn tail inside the plushie.
Keep both arms at roughly the same height for a symmetrical look, or place one slightly higher if you want a more playful pose.
Check the Body Shape
Give the ghost a gentle squeeze and check the stuffing.
The body should feel firm but soft, with no large empty areas. If you notice a hollow spot, carefully add a small amount of stuffing through the remaining opening before completely closing it.
Avoid overstuffing because excessive filling can stretch the stitches and make the body look uneven.
Secure and Hide Yarn Ends
Use your yarn needle to pull all remaining yarn tails into the inside of the body.
Pass each tail through several stitches before trimming the excess. This keeps the ends secure and gives the finished ghost a clean appearance.
Shape the Bottom
The body naturally forms the ghost’s rounded lower section as you crochet the increase and decrease rounds.
If you want a wavy ghost-sheet effect, gently shape the lower edge with your fingers after finishing. You can also add a simple decorative scalloped border around the bottom if you prefer a more pronounced wavy look.
For the basic version, you can leave the bottom plain.
Conclusion
This Mini Crochet Cute Ghost Plushie Pattern gives you a simple way to make a tiny handmade ghost using basic amigurumi techniques.
The body relies on a straightforward combination of single crochet, increases, decreases, and gradual stuffing. Once you understand that structure, you can customize almost everything else—the face, arms, colors, accessories, and size.
Keep your stitches tight, count your rounds, and add stuffing little by little. Those three habits will make the biggest difference in the finished shape.
And don’t be afraid to give your ghost some personality. A tiny change in the eyes or mouth can turn the same basic pattern into a sleepy ghost, happy ghost, shy ghost, or slightly suspicious ghost who looks like it knows exactly who ate the Halloween candy.
FAQ
Can beginners make this ghost plushie?
Yes. The pattern uses basic amigurumi stitches, so a confident beginner can handle it comfortably.
The most important skills involve maintaining consistent tension, counting stitches, and shaping with increases and decreases.
Can I use cotton yarn?
Absolutely.
Cotton yarn creates a firm, defined stitch pattern and works especially well for small amigurumi.
Acrylic yarn creates a softer feel and usually gives the plushie a slightly fluffier appearance.
Can I make the ghost bigger?
Yes.
Use thicker yarn and a larger hook for a larger ghost.
You can also add extra even rounds to increase the height while keeping the same basic body shape.
Can I sell finished ghosts made from this pattern?
You can generally sell handmade finished items you crochet from your own work, but check the terms attached to any pattern or design you use, especially if you combine someone else’s instructions, images, or branding.
Don’t copy or redistribute the written pattern itself as your own.
Can I make this ghost without safety eyes?
Yes, and embroidered eyes work beautifully.
Use black embroidery thread to create small eyes and a mouth. This option also gives you more control over the expression.